Building a mobile game in Xamarin Forms - MVVM Setup
by Shaun Lawrence
The fourth stop on our tour is MVVM.
MVVM Introduction
The Model-View-ViewModel (MVVM) pattern helps to cleanly separate the business and presentation logic of an application from its user interface (UI). Maintaining a clean separation between application logic and the UI helps to address numerous development issues and can make an application easier to test, maintain, and evolve. It can also greatly improve code re-use opportunities and allows developers and UI designers to more easily collaborate when developing their respective parts of an app. Further reading
For the purpose of this blog post, we will be writing the key parts required to make MVVM work to help understand how it all pieces together. There are many frameworks out there that provide the boiler plate code for this, so I typically use one of those in my more recent projects. One such framework is MVVM Helpers.
The fundmentals of MVVM within Xamarin.Forms require that we write our UI and business logic separately and then allow them to interact through the use of Bindings. The way that we provide the ability to interact is through the use of a key interface INotifyPropertyChanged.
MVVM in action
Using the result of our previous post Styling / resources we will start by creating a new folder under the root project. Let’s call it ViewModels.
Create our boilerplate code
And then let’s add a new class calling it BaseViewModel and make it implement INotifyPropertyChanged. This is where we are going to write our boilerplate code:
using System.Collections.Generic;
using System.ComponentModel;
using System.Runtime.CompilerServices;

public abstract class BaseViewModel : INotifyPropertyChanged
{
    protected virtual bool SetProperty<T>(
        ref T backingStore,
        T value,
        [CallerMemberName] string propertyName = "")
    {
        if (EqualityComparer<T>.Default.Equals(backingStore, value))
        {
            return false;
        }

        backingStore = value;
        OnPropertyChanged(propertyName);
        return true;
    }

    public event PropertyChangedEventHandler PropertyChanged;

    protected virtual void OnPropertyChanged([CallerMemberName] string propertyName = "") =>
        PropertyChanged?.Invoke(this, new PropertyChangedEventArgs(propertyName));
}
There is a bit more going on here than just implementing the interface so let’s break it down:
1. PropertyChanged
This is the only part that you are required to implement with INotifyPropertyChanged:
public event PropertyChangedEventHandler PropertyChanged;
Raising this will notify any subscribers that a property has changed. The event args included in the raise will tell the subscriber the name of the property that has changed this ties in with bindings because we bind to specific property names.
2. OnPropertyChanged
This allows us to raise the PropertyChanged event from inside our view models and only have to write the code to raise the event once.
[CallerMemberName] string propertyName = ""
The CallerMemberName attribute means that calls to the OnPropertyChanged method don’t have to specify the property name as a string argument. To read up on how this works see here.
3. SetProperty<T>
This is very much a helper method but it allows us to reduce the lines of code we write when creating properties that we wish to bind to and in MVVM there can be a LOT of those.
First we check to see if the underlying value really has changed:
if (EqualityComparer<T>.Default.Equals(backingStore, value))
{
    return false;
}
If the value has changed then we store it and call our OnPropertyChanged method:
backingStore = value;
OnPropertyChanged(propertyName);
Finally we return whether the value changed to allow the caller to do something different if it did change.
Create our first ViewModel
Yes let’s go ahead and create one! Let’s call it MainPageViewModel and make it inherit from BaseViewModel, I like this naming convention because it should be clear that this ViewModel will interact with our MainPage. Of course not all ViewModels and Views have this one-to-one mapping but when they do it can help to make it clear.
Now that we have our ViewModel let’s set it to the BindingContext of our View. I like to do this in the XAML itself but it can also be done in the code behind. Note that you only need to do one of these options.
Update our XAML
We first need to include the namespace for our ViewModels by adding the following to the top ContentPage element.
xmlns:viewmodels="clr-namespace:Pairs.ViewModels"
Next we will delete the entire contents on the StackLayout element so we can build our UI again. You should have the following:
<?xml version="1.0" encoding="utf-8" ?>
<ContentPage xmlns="http://xamarin.com/schemas/2014/forms"
             xmlns:x="http://schemas.microsoft.com/winfx/2009/xaml"
             xmlns:viewmodels="clr-namespace:Pairs.ViewModels"
             x:Class="Pairs.MainPage"
             BackgroundColor="{StaticResource Color01}">

    <StackLayout HorizontalOptions="Center"
                 VerticalOptions="CenterAndExpand">

    </StackLayout>

</ContentPage>
Now we have a set of things to add so let’s following in an orderly fashion:
1. Set the binding context
Then we can add the following as a child of the ContentPage element:
<ContentPage.BindingContext>
    <viewmodels:MainPageViewModel />
</ContentPage.BindingContext>
2. Add our UI content
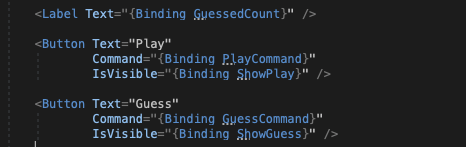
Inside the StackLayout let’s add the following:
A Label to show how many correct guesses we have made:
<Label Text="{Binding GuessedCount}" />
A Button to start playing:
<Button Text="Play"
        Command="{Binding PlayCommand}"
        IsVisible="{Binding ShowPlay}" />
Another Button to simulate a successful guess:
<Button Text="Guess"
        Command="{Binding GuessCommand}"
        IsVisible="{Binding ShowGuess}" />
3. Compiled bindings
You may notice that Visual Studio reports something like:
“Member not found in data context ‘MainPageViewModel’”.
It is worth pointing out that we haven’t actually added these properties to our view model yet. Bindings try their best, so if we were to build and run the application it would successfully compile and run, but the Buttons wouldn’t do anything. I much prefer having compile-time validation of whether things are not configured correctly. This is where Compiled bindings come in. Not only do they provide us with the compile-time validation, but they also provide us with some performance benefits.
Let’s turn this on, all we need to do is add this line to our ContentPage element:
x:DataType="viewmodels:MainPageViewModel"
Now if we try to compile our application it will fail reporting errors relating to properties not existing. Let’s take a quick look at what the resulting XAML should look like in the MainPage.xaml file and then go and fix the errors:
<?xml version="1.0" encoding="utf-8" ?>
<ContentPage xmlns="http://xamarin.com/schemas/2014/forms"
             xmlns:x="http://schemas.microsoft.com/winfx/2009/xaml"
             xmlns:viewmodels="clr-namespace:Pairs.ViewModels"
             x:Class="Pairs.MainPage"
             BackgroundColor="{StaticResource Color01}"
             x:DataType="viewmodels:MainPageViewModel">
    <ContentPage.BindingContext>
        <viewmodels:MainPageViewModel />
    </ContentPage.BindingContext>

    <StackLayout HorizontalOptions="Center"
                 VerticalOptions="CenterAndExpand">

        <Label Text="{Binding GuessedCount}" />

        <Button Text="Play"
                Command="{Binding PlayCommand}"
                IsVisible="{Binding ShowPlay}" />

        <Button Text="Guess"
                Command="{Binding GuessCommand}"
                IsVisible="{Binding ShowGuess}" />

    </StackLayout>

</ContentPage>
Fix our View Model
We have a good number of items to add here, so we will do it step-by-step that will hopefully make it easier to follow:
1. GuessedCount property
We finally get to make use of the boilerplate code that we used from the BaseViewModel class.
private int guessedCount;

public int GuessedCount
{
    get => guessedCount;
    set => SetProperty(ref guessedCount, value);
}
To reiterate the value of the SetProperty helper method, we can pass in the backing store field so the method can update it’s value if it has changed. Also calling the method will use the name of the calling property and raise that in the PropertyChanged event, so in this example it will raise "GuessedCount".
2. ShowGuess property
private bool showGuess;

public bool ShowGuess
{
    get => showGuess;
    set => SetProperty(ref showGuess, value);
}
Yes I know, we decided to use MVVM and now we are storing some view related state in the view model. This is only going to be temporary while we get bits up and running. Later on in the series (converters) we can explore how to remove this.
3. ShowPlay property
private bool showPlay = true;

public bool ShowPlay
{
    get => showPlay;
    set => SetProperty(ref showPlay, value);
}
4. PlayCommand
public ICommand PlayCommand { get; }

public MainPageViewModel()
{
    PlayCommand = new Command(() => OnPlay());
}

private void OnPlay()
{
    ShowPlay = false;
    ShowGuess = true;
}
This command will fire when the Play Button is tapped and will show the Guess Button.
5. GuessCommand
public ICommand GuessCommand { get; }

public MainPageViewModel()
{
    GuessCommand = new Command(() => OnGuess());
}

private void OnGuess()
{
    GuessedCount++;
}
This command will fire when the Guess Button is tapped and increment the GuessedCount property to show the user they did something.
We should now have something that finally compiles and runs so let’s try it out.

Conclusion
We have talked through the benefits of using MVVM and then applied it to our application. Admittedly we still have some view state information inside our view model but those will be removed in a later post.
I hope that this has given a good overview of how a view and view model interact with each other and shown some practical examples of doing so. In our next post Bindable Layouts we will expose more complex interact with a collection of items to display on
Links
The source for the end of this stage can be found at:
https://github.com/bijington/mobile-game-xamarin-forms/tree/part-four-mvvm-setup
| Previous | Next |
|---|---|
| Styling / resources | BindableLayout |